Publisher Supplied Gathering
These instructions describe the process of adding files to PANDORA
that have not been gathered using PANDAS. This situation occurs when publishers
choose to push files to us rather than let us gather the title, or we are
unable to successfully gather a title and the publisher forwards us the files
upon request (say via a CD or FTP). Additionally some titles will only be
distributed via email as a file attachment. These instructions cover how to add
files to PANDAS via WebDav. You can add the files immediately and you
can also set a schedule to create an alert that re-archiving is due at
intervals (e.g. monthly, quarterly, annual) or on dates that you specify.
The procedure involves creating a 'dummy' instance for the title
using the PANDAS gatherer to use to attach the supplied files to. This
procedure is the same for publisher-supplied normal and publisher-supplied
email gathers. Before gathering a publisher-supplied title you should ensure
that the basic management details for the title are up-to-date - that is for
example, its Status should be set at "National Preservation" and the
Standing should be set at "current". You should also ensure you have
ownership of the title.
Publisher Supplied gathering
procedures
Procedures covered in these instructions are:
- Search for the title you wish to gather
- Click on the title to go to the Title View screen
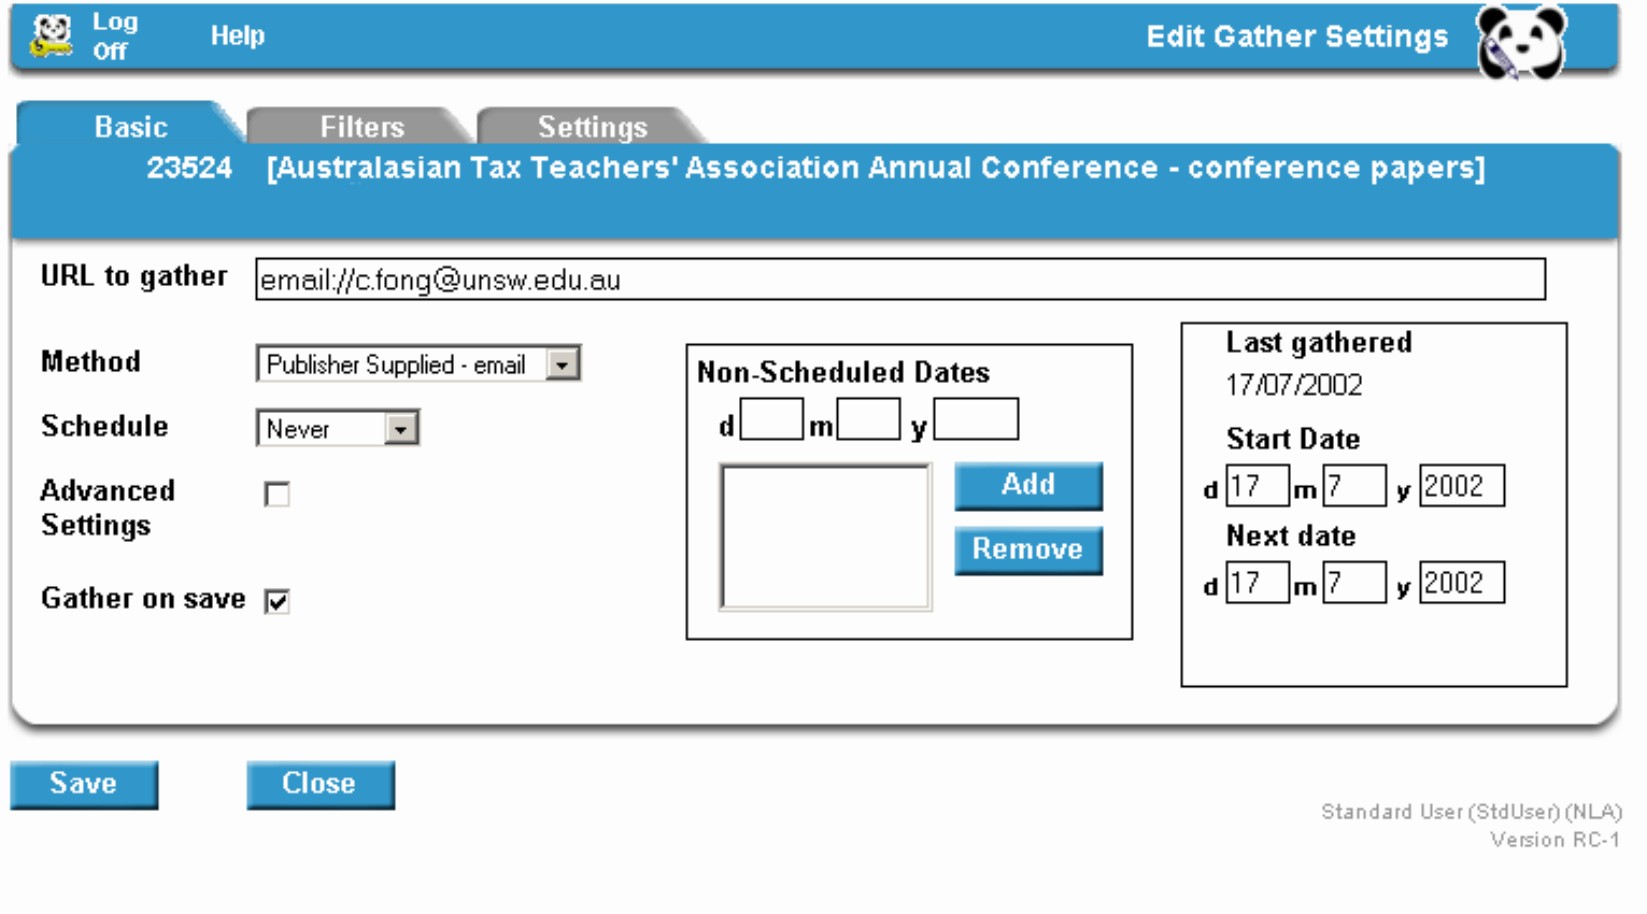
- Click on Gather Detailsfrom the Menu Bar. You will be
taken to the Edit Gather Settings screen Basic tab
window

- On the Basic tab window you can specify the URL to
gather. This is the starting URL for the gather process. This will default
from the Publisher's URL you have already entered when creating the
title record (and which provides the link to the publisher's site on the title
entry page). It is OK to have an email address in this field if the title is
supplied by email.
- Select the gather Method from the drop-down list.
Options are:
Publisher Supplied - normal (For titles that
the publisher supplies by FTP, CD or ZIP disk.)
Publisher Supplied -
email (For titles that the publisher supplies by email.)
- Select the gather Schedule from the drop-down list. If
the title is only to be gathered once, select the option Never (i.e.
meaning that it will not be scheduled to be regathered.)
- If you want to request the title to be gathered on specific
dates (either instead of or in addition to a gather schedule) enter the date in
the Non-Scheduled Dates box and click the Add button. Repeat to
set more than one date. These gathe dates can be removed by highlighting the
date in the list and clicking the Remove button.
- Enter a start date for the gather schedule in the boxes
labelled Start Date. In this section of the screen you will also find
when the title was last gathered and the next scheduled gather date.
- Click on theSave button.
- If you want to gather the title straight away (whether it is
for a one off gather or if you have set a schedule) click the Gather on
save tick box then click Save. This will initiate the gather process
when you click the Save button.
The next step after creating the 'dummy' instance is to process
the gather and add the files via WebDav.
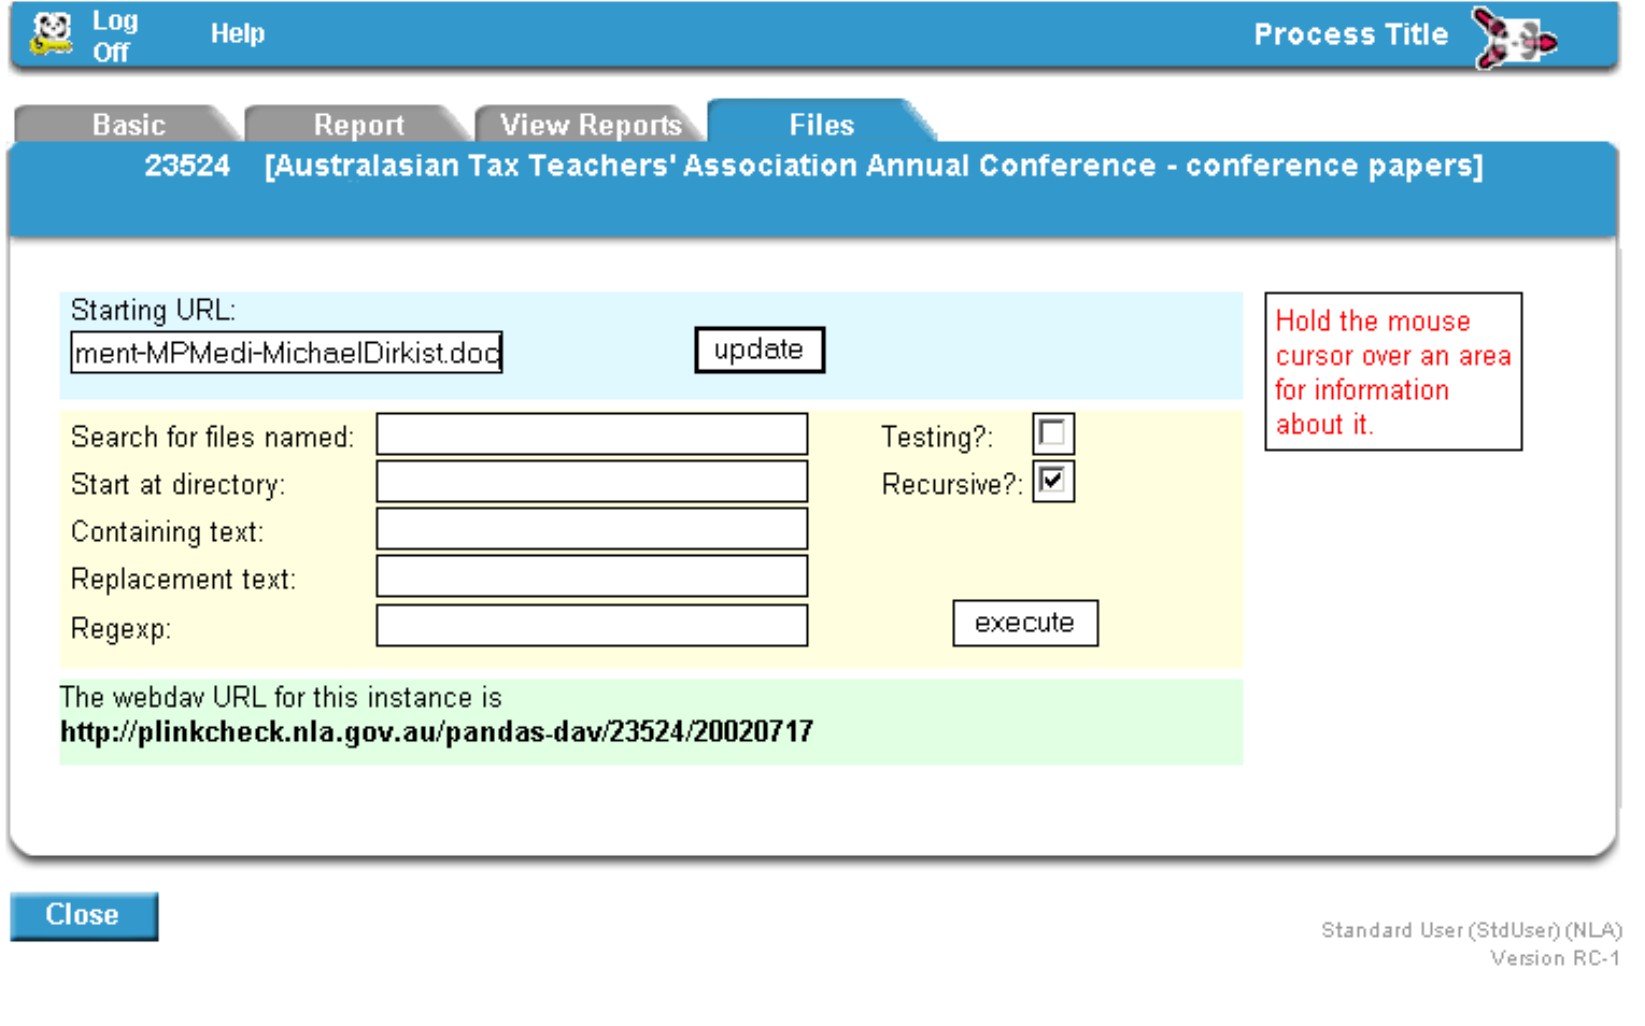
- In Process Title go to the File tab.
- The first step is to create a starting URL for the system so
the location of the first file is known. This takes the format of [starting
folder]/[first file to be accessed]. For example for an email supplied title
this may be c.fong_unsw.edu.au as the folder (no sub-folder applies in this
example) and then the file may be
TaxPolicyDevelopment-MPMedi-MichaelDirkist.doc. This is input into the Starting
URL field as: c.fong_unsw.edu.au/TaxPolicyDevelopment-MPMedi-MichaelDirkist.doc
:

- Click on the Update button.
- Copy the WebDav URL displaying in the green area of the screen
and paste into My Network Places to enter WebDav (see detailed
instructions under Processing Titles).
- In My Network Places call the toplevel folder a
meaningful name and then create a folder to represent the starting folder as
described in step 2 above. If the files you are adding reside in sub-folders
(sub-directories) of this starting folder create these as well.
- Copy the file or files you wish to add to the gather and paste
them into the appropriate directory in WebDav (these should have been
saved locally to your PC first).
- Return to the Basic tab and press the Archive
button.
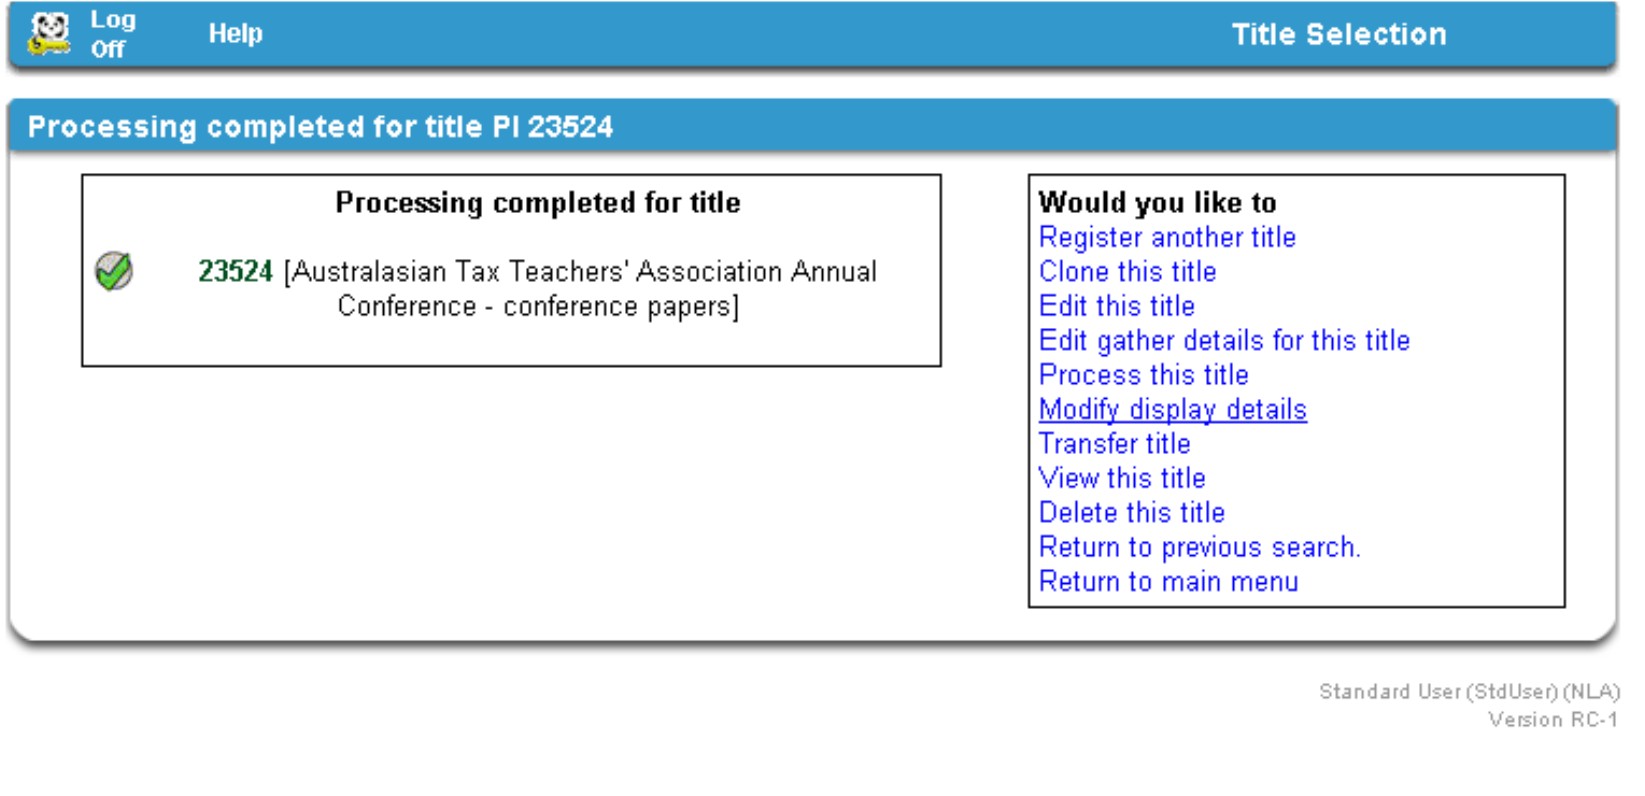
- Processing has now been completed for the instance and the
files have been gathered. From the Title Selection screen select
Modify Display details.

- From the Edit Title Entry Page screen select
Instances, then click on the link to view the archived instance you have
created (remembering that there is a delay after processing an instance before
you can view it in this screen). The first file you added will now display
(this was the one specified in the Starting URL box on the Files
tab of the Process Title screen). Using this archived instance URL as a
base URL you can now change the file name within the URL string to view any
other file you may have added via WebDav (or alternatively you may be
able to navigate through the archived title as you normally would). The aim is
to check that all files have been archived OK. If there are no issues or
copyright statements to add skip step 2.
- Now select Instances and add issues if applicable by
pasting in their corresponding URLs copied from the archived instance you have
viewed. Similarly, paste in the URL for the copyright statement if one exists
via the Copyright tab.
- Preview the TEP if necessary and then click on Archive,
and again Archive on the next screen.
|
![[Pandora Archive logo]](http://pandora.nla.gov.au/nla/pandora/pandora6.gif)
![[Pandora Archive logo]](http://pandora.nla.gov.au/nla/pandora/pandora6.gif)
![[National Library of Australia]](http://pandora.nla.gov.au/nla/pandora/logo.gif)