Creating and Editing Title Entry Pages (Display Details Screen)
Once an title instance has been processed the next step is to
create or edit the title entry page (also referred to as TEP hereafter).
Procedures covered in this section include:
Creating and Editing Title Entry
Pages
The processes for creating and editing title entry pages are very
similar. The only difference is that when editing a TEP there will already be
at least one instance, plus possibly issue(s), issue group(s), a
copyright/disclaimer notice, Kinetica metadata, and introductory notes etc.
- From the Title View screen click on Display
Details or from the Title Selection screen click on Modify
display details.
- The Edit Title Entry Page screen will appear:
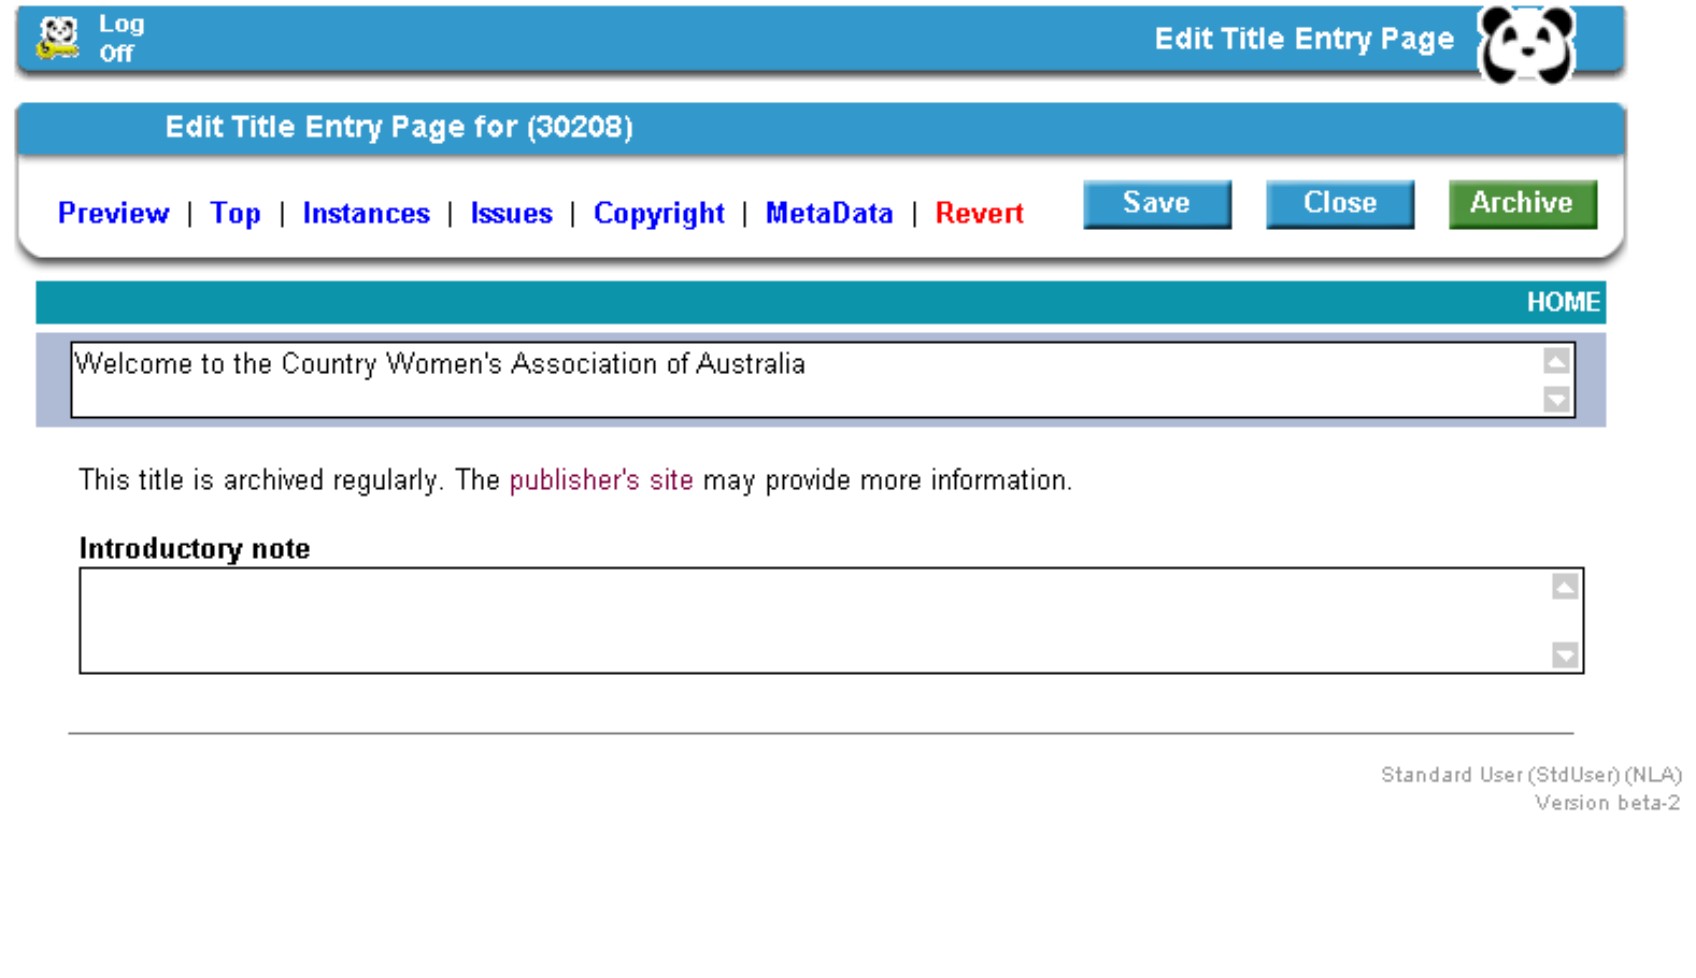
This screen has the following functionality:
Preview provides a check of the title entry page before
archiving.
Top permits viewing and changing of the title and
introductory note areas.
Instances will list all processed
and/or archived instances of the title. Check boxes allow these to be displayed
or hidden as required by the title. For further information see
Instances .
Issues is the area for
adding, deleting, moving and modifying issues and adding, deleting, moving and
modifying groups for organising the issues. For further information see
Issues and Issue
Groups.
Copyright allows input of archived copyright
and/or disclaimer URLs.
Metadata is the area where PANDAS
links with Kinetica to convert the cataloguing record to metadata for use
within the PANDAS system.
Revert will undo all changes made to
the title entry page in the current user session (but not if the page has been
saved).
Save will save the changes made to the title entry
page. However this will not move the TEP into the PANDORA public interface.
Save must be performed before
Archive.
Close will close the screen without
saving any changes and return you to theTitle View
screen.
Archive will archive the title entry page.
Once the Archive button is clicked a further screen will open up
with check boxes for Display in listings and Display in
collections; both of these must be checked:
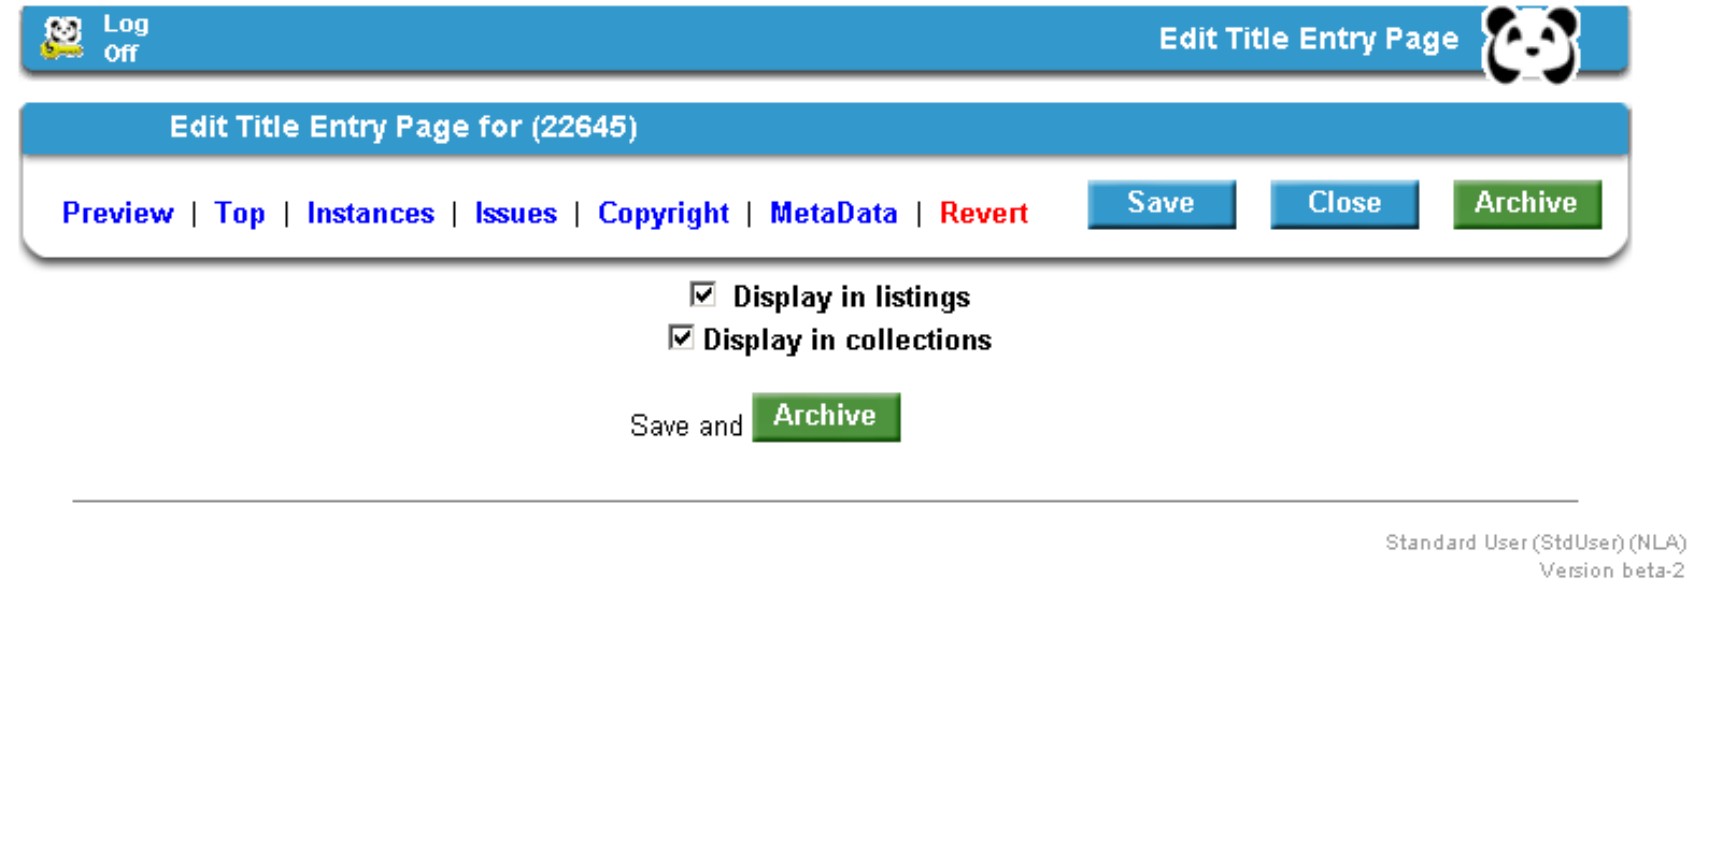
The final
step in creating a title entry page is to click on Save and
Archive. There will be a 5 minute delay between this action and when
the links in the completed TEP are functional in the PANDORA public
interface.
Instances
There must be at least one processed instance for a title entry
page to be created. The first step in creating a TEP is to display an
instance.
- Click on the Instances button in the Edit Title Entry
Page screen. The following screen will appear:
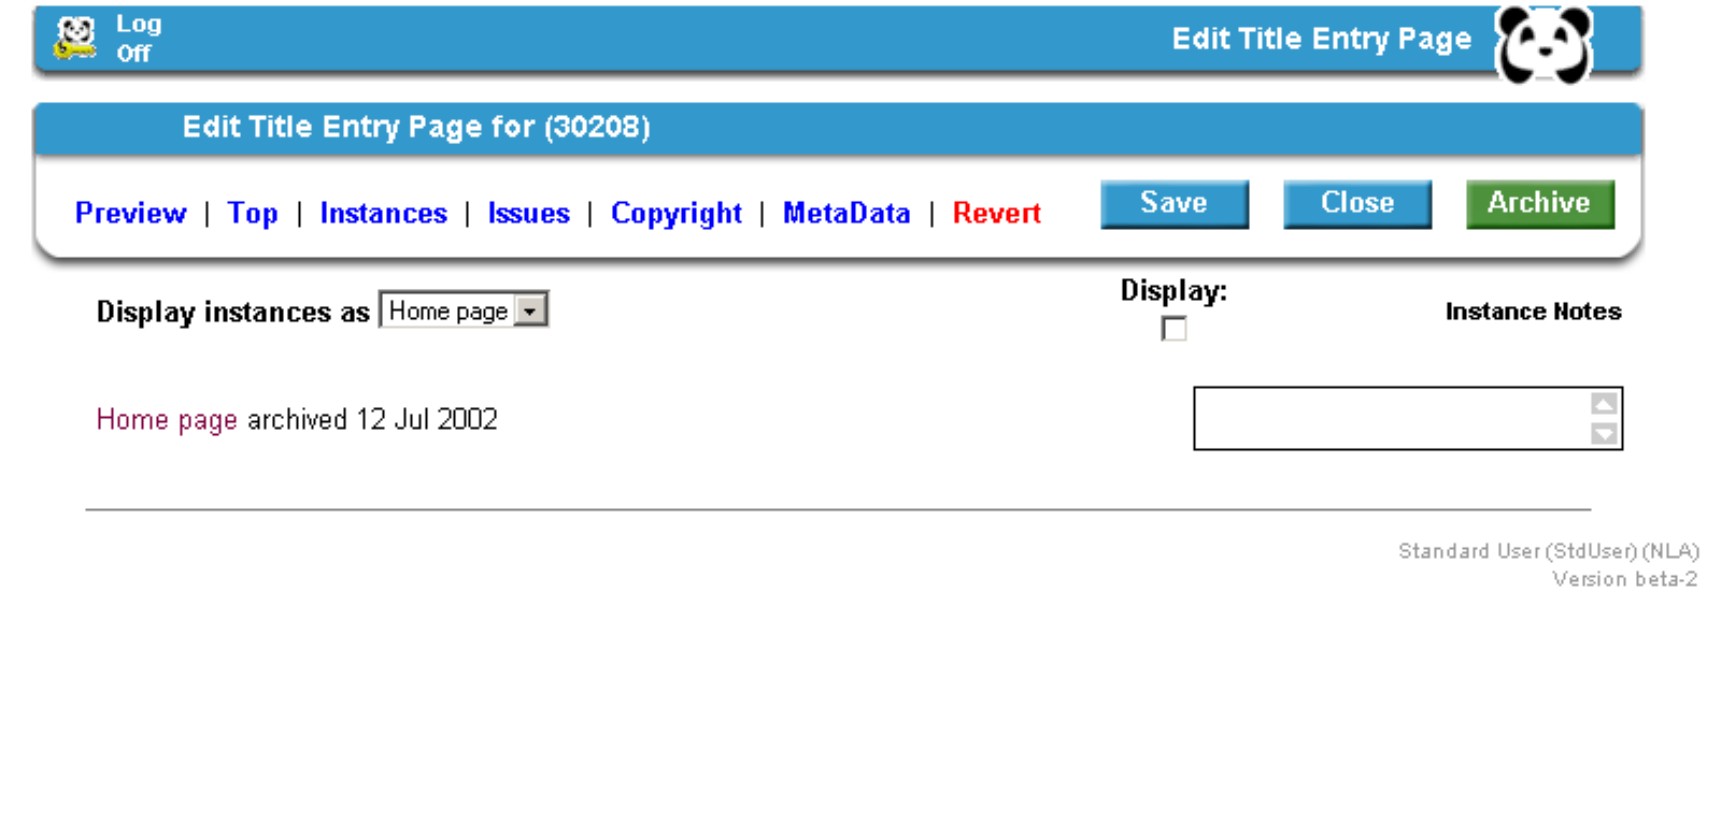
- Instances can be displayed (labelled) as Home page, Title or
Site. Select the appropriate label from the dropdown list.
- Check the Display box to ticked.
- Add any appropriate notes to the Instance Notes
box.
Issues
Issues can only be added to records that are in serial format.
- Click on the Issues button in the Edit Title Entry
Page screen. The following screen will appear:
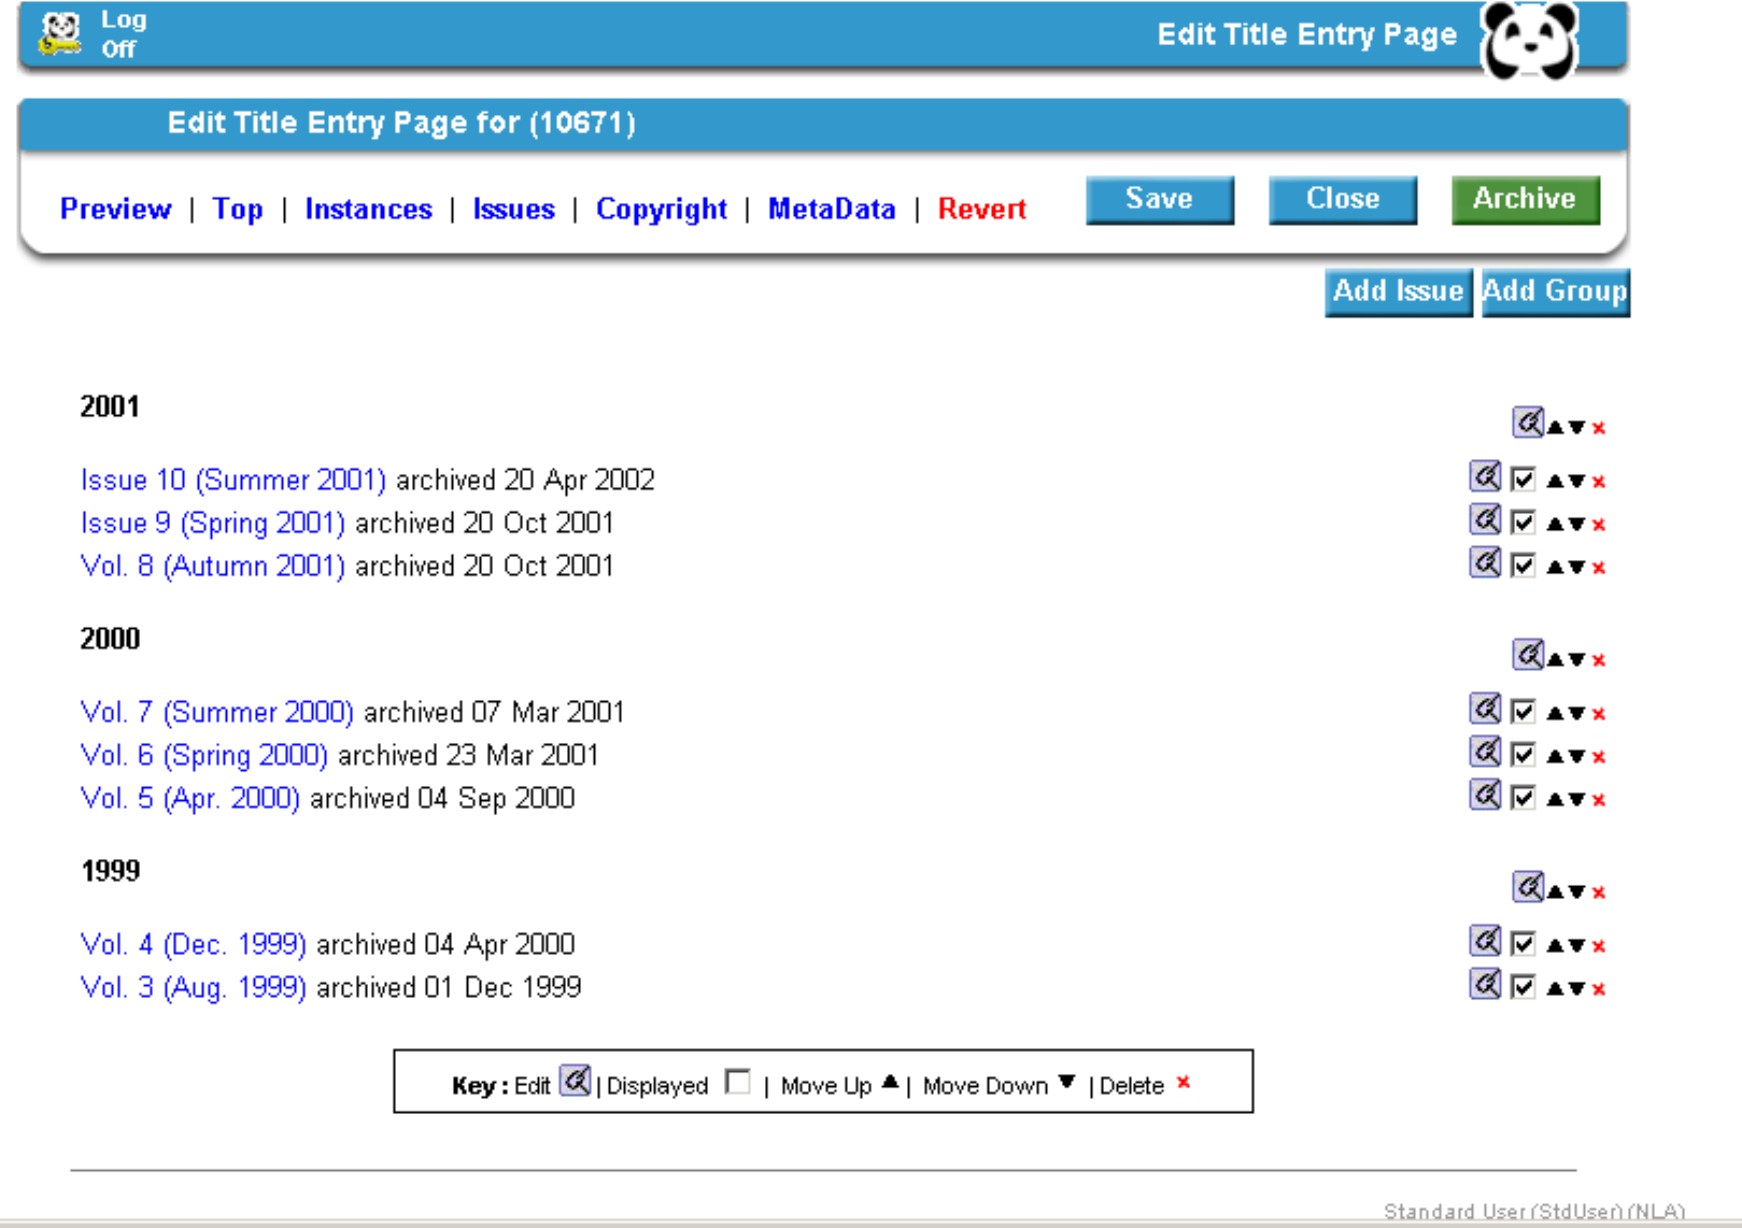
This
example shows existing issues displayed into groups organised by year. The
symbols appearing next to each issue permit the issue to be edited, displayed,
moved up, moved down, or deleted. To access each of these functions click on
the appropriate symbol. Similarly groups can be edited, moved up or down, or
deleted.
- To Add an issue click on the Add Issue button.
The following popup edit issue window will appear:
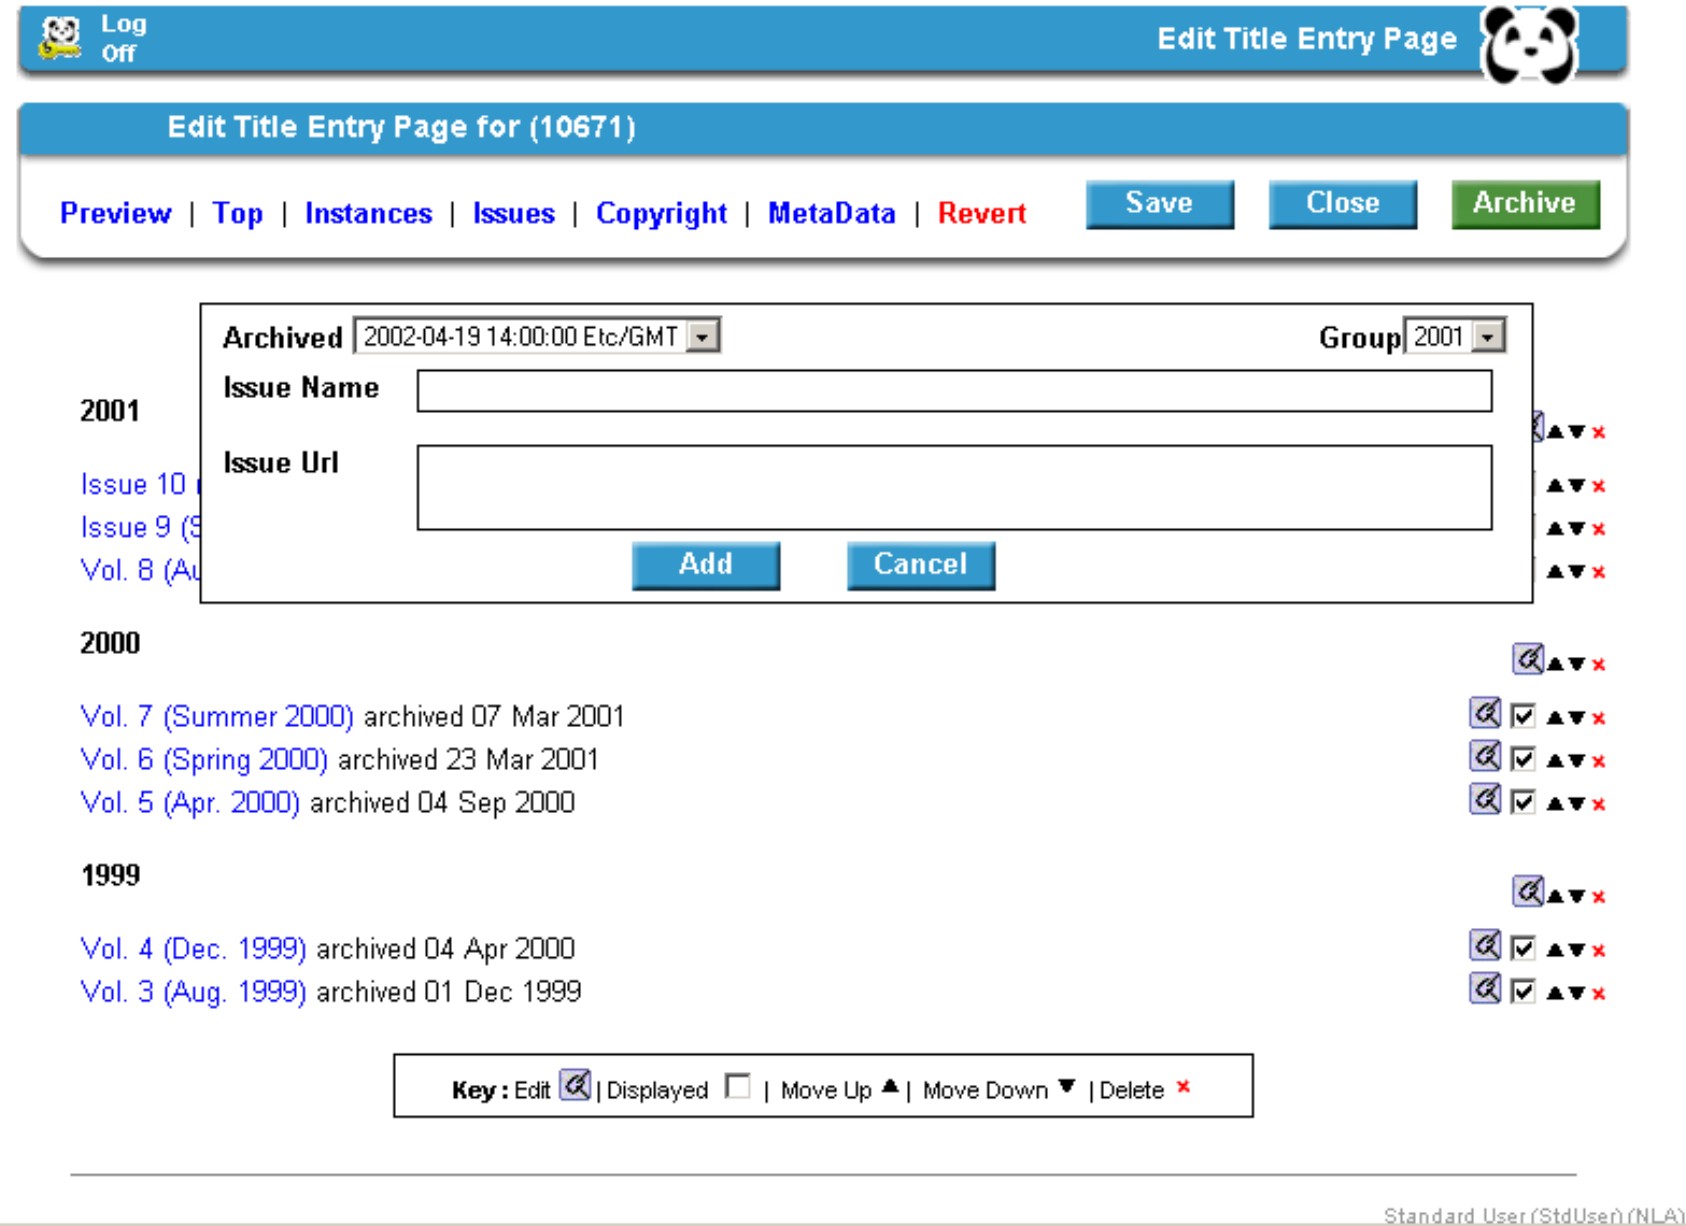
- Type in the issue name (label), then copy and paste the issue
URL from the archived instance. Check the correct group is appearing in the
Group box, and then click the Add button.
- To Edit an issue click on the Edit symbol next to
the issue you wish to edit. Again, a window will appear allowing you to edit
the issue and group details. Click the Edit button to complete the
process.
Issue Groups
Issues groups can only be added to records that are in serial
format.
- Click on the Issues button in the Edit Title Entry
Page screen. As before the following screen will appear:

- To Add a group click on the Add Group button. The
following popup edit issue window will appear:
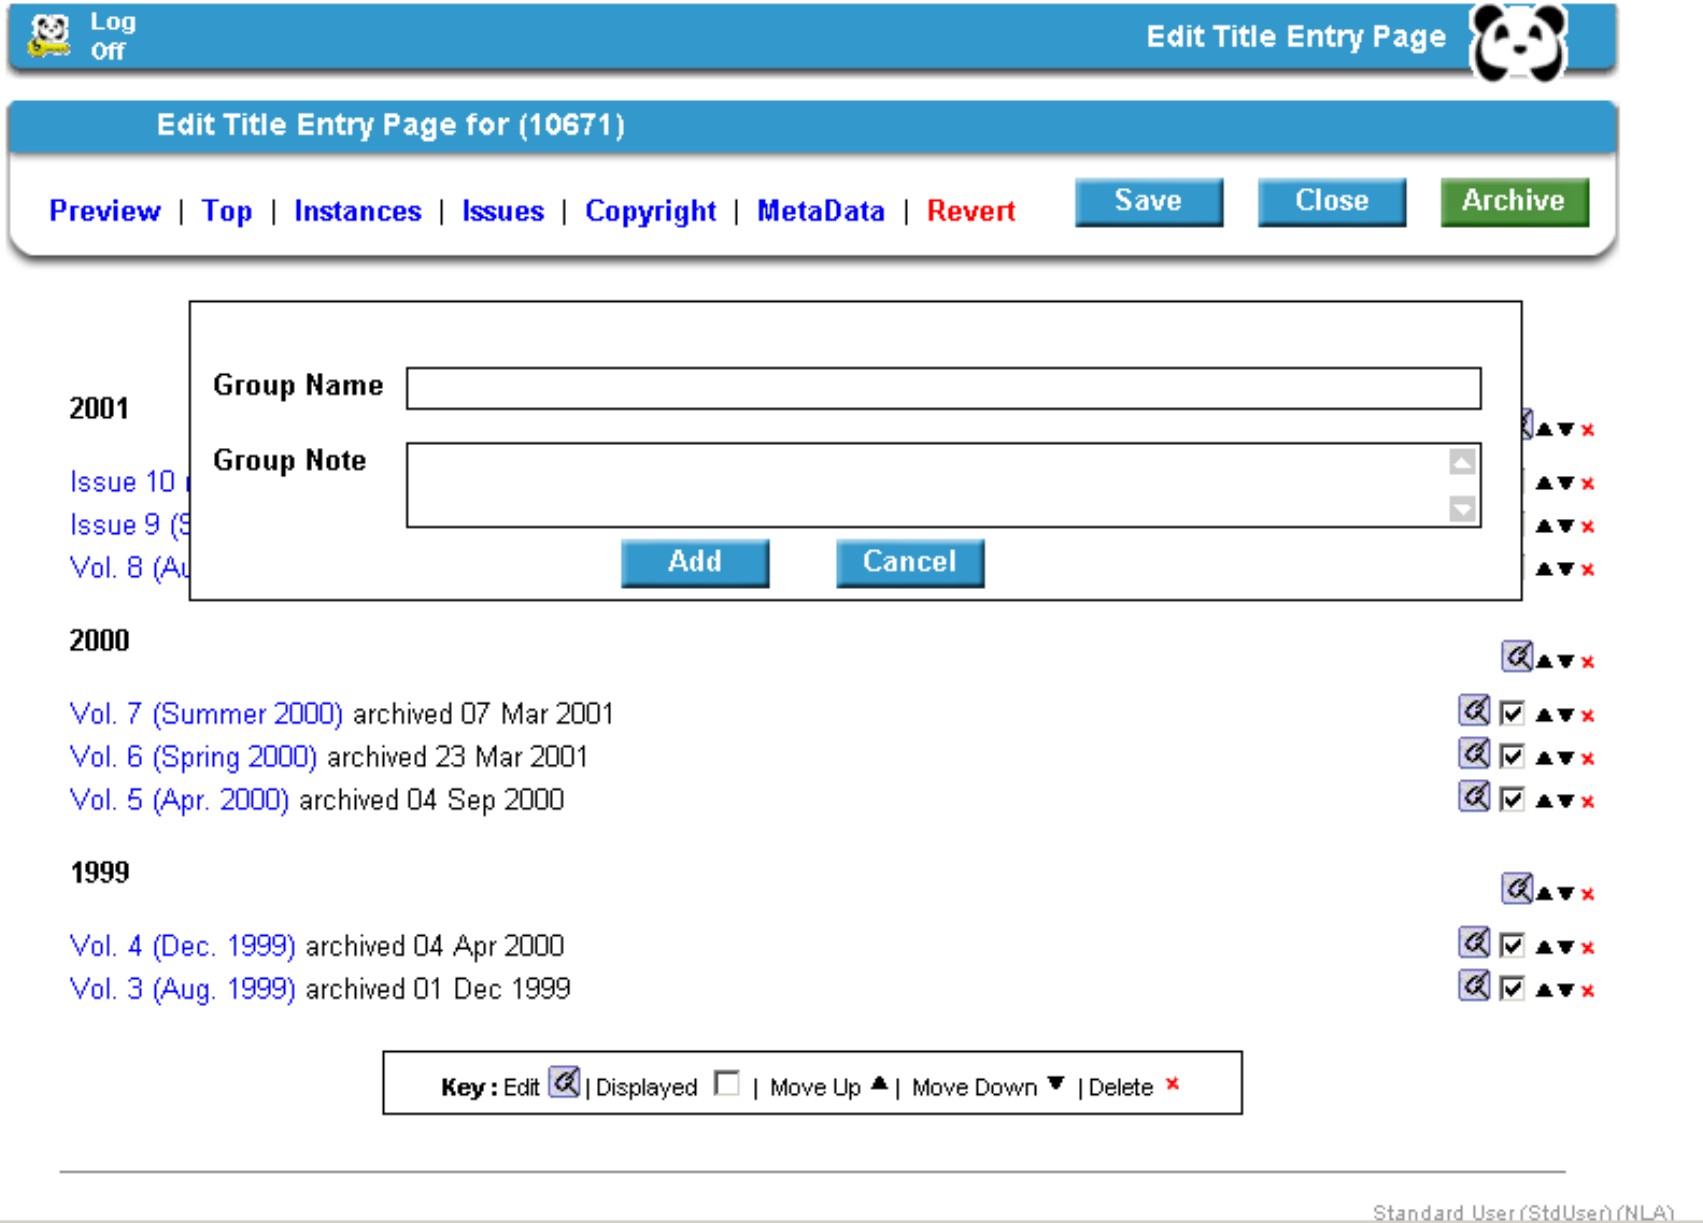
- Type in the group name (label), then add a group note as
necessary (this will display on the TEP). Then click the Add
button.
- To Edit a group click on the Edit symbol next to
the group you wish to edit. Again, a window will appear allowing you to edit
the group details. Click the Edit button to complete the process.
|
![[Pandora Archive logo]](http://pandora.nla.gov.au/nla/pandora/pandora6.gif)
![[Pandora Archive logo]](http://pandora.nla.gov.au/nla/pandora/pandora6.gif)
![[National Library of Australia]](http://pandora.nla.gov.au/nla/pandora/logo.gif)